

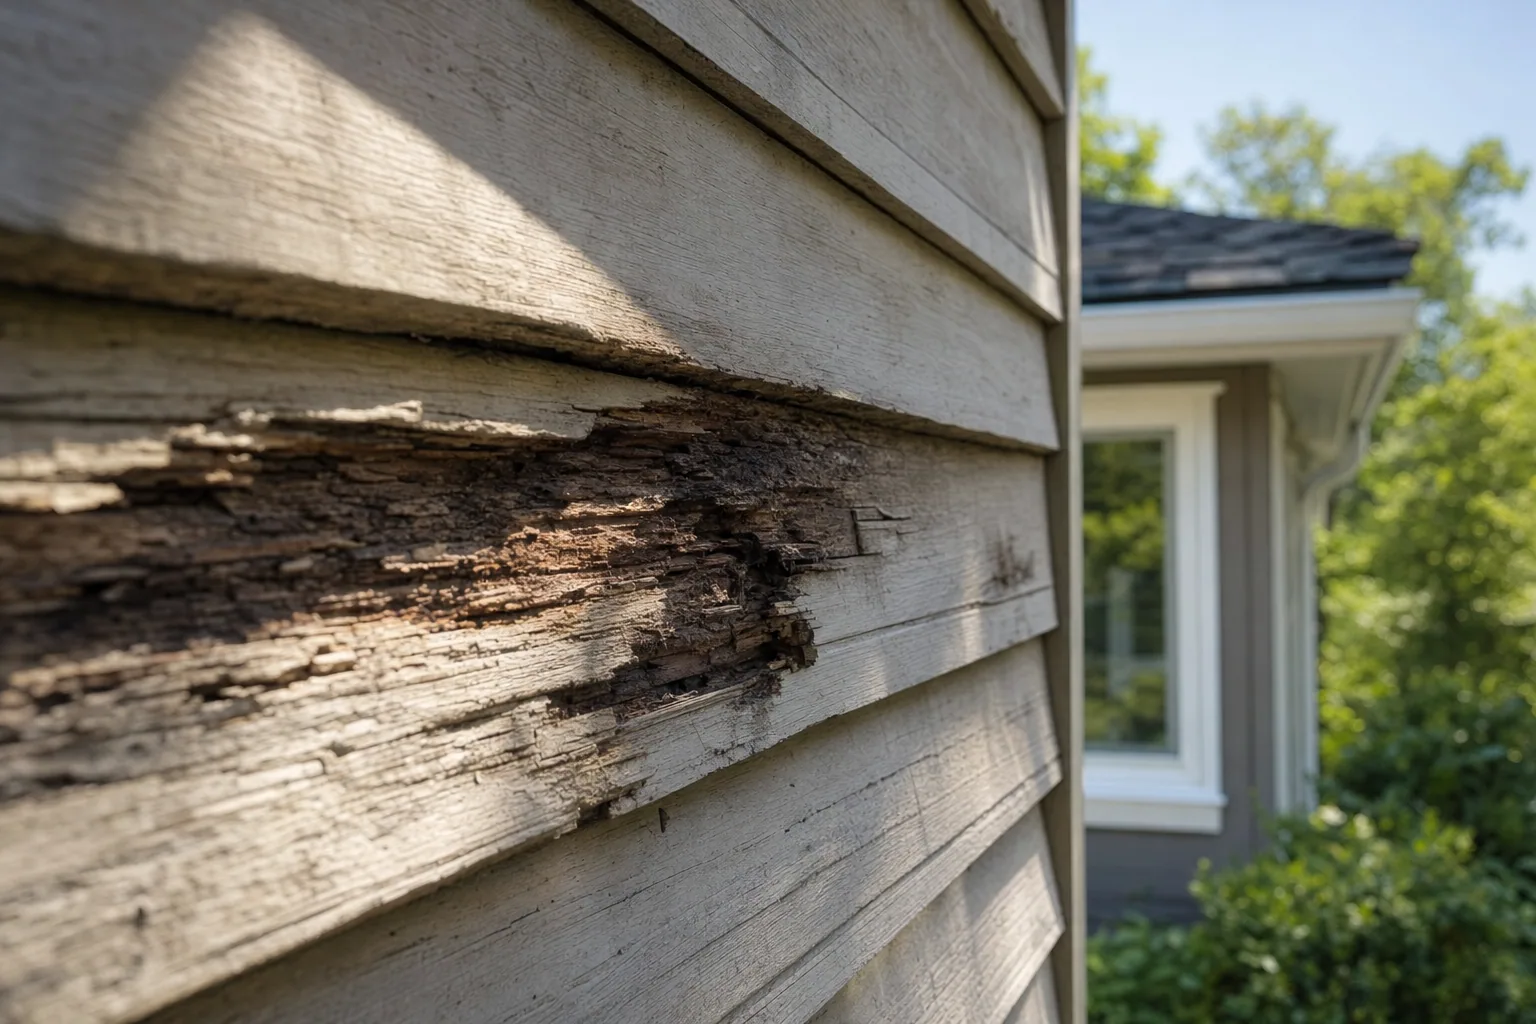
Wood siding adds warmth and charm to a home, but it requires regular attention to stay healthy. When wood siding rot takes hold, it can quickly compromise your home's structural integrity and lead to expensive water damage inside your walls. Understanding what causes rot, how to spot it early, and when to call for help can save you thousands of dollars and protect your family from moisture-related problems.
What Causes Wood Siding Rot
Wood siding rot develops when moisture penetrates the wood surface and stays there. Unlike vinyl or engineered materials, real wood is porous and absorbs water. If that moisture doesn't dry out quickly, it creates the perfect environment for fungal growth that breaks down the wood's fiber structure.
Several conditions speed up the rotting process:
- Standing water trapped against the siding
- Poor drainage around the foundation
- Missing or damaged caulk at joints and trim
- Cracks or holes in the wood surface
- Paint peeling or failing to seal the wood
- Lack of proper ventilation behind the siding
- Overhanging tree branches that block sunlight and airflow
In Tulsa's climate, heavy spring rains and summer humidity create extra moisture challenges for wood siding. Wind-driven rain can force water into small gaps and seams you might not even see from the ground. Storm damage that goes unrepaired, like dents or gouges, also opens the door to moisture penetration.
How to Spot Wood Siding Rot Early
Early detection is your best defense. Catching rot in its early stages means you may only need to replace a few damaged boards instead of rebuilding entire wall sections.
Look for these warning signs:
- Soft spots that feel spongy when you press on them with a screwdriver or your fingernail
- Discoloration such as dark stains, streaks, or areas where the wood has turned almost black
- Peeling or blistering paint that suggests moisture is trapped underneath
- Gaps opening up between boards as the wood shrinks unevenly
- Visible decay where the wood surface looks crumbly or stringy
- Visible mold or mildew growth, which often indicates excess moisture
- Sagging sections that suggest the underlying structure has weakened
Pay special attention to areas where siding meets trim, around window and door frames, near downspouts, and at corners where water tends to collect. The bottom courses of siding are most vulnerable because water naturally runs down and pools there.
Inspection Best Practices
A thorough inspection is the foundation of any repair decision. You can do a basic visual check yourself, but a professional inspection catches hidden damage you might miss.
During a professional inspection, a contractor will:
- Examine every visible section of siding from multiple angles
- Use tools to test wood hardness and identify soft spots
- Check caulking, flashing, and sealing around penetrations
- Assess drainage patterns and water flow around the home
- Look behind gutters and downspouts for moisture problems
- Inspect the foundation and grading for water management issues
If rot is found, the inspector should identify not just the visible damage but also the root cause. Fixing the damage without solving the moisture problem means the rot will come back.
Repair vs. Replacement Decisions
Small areas of rotted wood can often be repaired by cutting out the damaged section, treating the remaining wood, and patching with new material. This approach works when rot is limited to one or two boards and hasn't spread into the structural framing.
Full board or section replacement becomes necessary when:
- Rot extends across multiple boards
- The damage reaches the rim joist or structural framing
- The integrity of the wood is too compromised to safely repair
- Water intrusion has created a larger moisture problem
For extensive damage, many homeowners choose a complete siding replacement rather than patching multiple rotted areas. Engineered wood or vinyl siding eliminates the rot risk entirely while improving energy efficiency and reducing long-term maintenance.
Preventing Future Rot
Once you've repaired or replaced damaged wood siding, protecting it from rot means managing moisture and maintaining the protective barriers.
Key prevention strategies include:
- Keep gutters and downspouts clean and direct water at least 4-6 feet away from the foundation
- Apply fresh caulk annually around windows, doors, and trim to seal gaps
- Repaint or reseal exterior wood every 3-5 years to maintain the moisture barrier
- Trim tree branches to improve airflow and sunlight exposure
- Ensure proper grading so water slopes away from the house
- Install or repair flashing around chimneys, vents, and roof edges
- Address storm damage promptly before water has time to penetrate
Regular maintenance and quick repairs keep small problems from becoming expensive disasters. A simple caulk application today prevents the moisture that leads to rot tomorrow.
When to Call a Professional
If you spot soft wood, discoloration, or any signs of rot, contact a siding specialist before the problem spreads. What looks like damage to one board might indicate a much larger moisture issue affecting your home's framing.
Trifecta Roofing and Restoration specializes in identifying and repairing wood siding rot as part of comprehensive siding repair and restoration services. Our team uses top-grade materials and proven techniques to stop rot at its source, address underlying moisture problems, and restore your home's exterior protection. With a 4.9-star rating backed by 150+ reviews, we understand Tulsa homeowners' needs and deliver solutions that stand the test of time.
Don't let a small spot of rot turn into a major structural problem. Schedule a free inspection today and get an honest assessment of your wood siding's condition. Early action protects your home, your family, and your investment.